Beranda
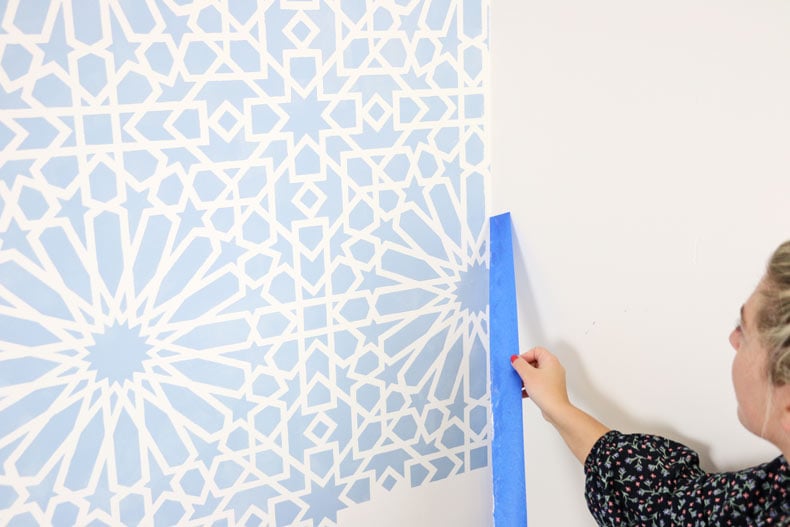
/ Diy Wall Stencil Tutorial : Easy Diy Wall Mural Ideas One Brick At A Time - Using your stencil level, attach your stencil to a corner of your wall using painters tape.
Diy Wall Stencil Tutorial : Easy Diy Wall Mural Ideas One Brick At A Time - Using your stencil level, attach your stencil to a corner of your wall using painters tape.
Insurance Gas/Electricity Loans Mortgage Attorney Lawyer Donate Conference Call Degree Credit Treatment Software Classes Recovery Trading Rehab Hosting Transfer Cord Blood Claim compensation mesothelioma mesothelioma attorney Houston car accident lawyer moreno valley can you sue a doctor for wrong diagnosis doctorate in security top online doctoral programs in business educational leadership doctoral programs online car accident doctor atlanta car accident doctor atlanta accident attorney rancho Cucamonga truck accident attorney san Antonio ONLINE BUSINESS DEGREE PROGRAMS ACCREDITED online accredited psychology degree masters degree in human resources online public administration masters degree online bitcoin merchant account bitcoin merchant services compare car insurance auto insurance troy mi seo explanation digital marketing degree floridaseo company fitness showrooms stamfordct how to work more efficiently seowordpress tips meaning of seo what is an seo what does an seo do what seo stands for best seotips google seo advice seo steps, The secure cloud-based platform for smart service delivery. Safelink is used by legal, professional and financial services to protect sensitive information, accelerate business processes and increase productivity. Use Safelink to collaborate securely with clients, colleagues and external parties. Safelink has a menu of workspace types with advanced features for dispute resolution, running deals and customised client portal creation. All data is encrypted (at rest and in transit and you retain your own encryption keys. Our titan security framework ensures your data is secure and you even have the option to choose your own data location from Channel Islands, London (UK), Dublin (EU), Australia.
Diy Wall Stencil Tutorial : Easy Diy Wall Mural Ideas One Brick At A Time - Using your stencil level, attach your stencil to a corner of your wall using painters tape.. You will need both the original wall paint and the stencil paint to do the clean up. To stencil into the corners, ceiling line, or floor line you will need to bend the stencil and use a small stencil brush.follow this helpful video tutorial: For more than 200 detailed diy and craft tutorials for all ages, visit my tutorial page! When i first told my husband that i wanted to stencil, not one, but two feature walls during the weekend makeover of our children's room , i think he thought i was crazy. Eventually, though, that easier section was done, and it was time to tackle the edges.
See more ideas about cutting edge stencils, stencils, stencils wall. This tutorial is truly from the beginner standpoint. The elements of design that every room needs are color, pattern, and texture. Learn how to make wall art with a custom stencil. If those the tiny pieces of the stencil aren't adhered to the wall, the paint can seep underneath and create a very messy pattern.
Tips Tricks You Must Know To Stencil Walls Like A Pro Stencil Stories from www.cuttingedgestencils.com Each stenciling video tutorial will go into detail about the type of paint and stencil supplies needed to perfectly execute your diy stenciling project. Once your paint is dry, tape off all edges of your wall with the blue painter's tape. It does help with creating crisper lines on textured walls so you'll have less touch ups later, but often requires you to go a bit slower and allow the paint to dry more in between each stencil. Contact paper or vinyl shelf paper serves as material to make your own wall stencils for art, phrases or designs of your creation. To stencil into the corners, ceiling line, or floor line you will need to bend the stencil and use a small stencil brush.follow this helpful video tutorial: Today i'll show you how to create beautiful wall art using a stencil made with your cricut. But with so many elements, it can be hard to include each when you are decorating. Diy projects & videos | crafts | wall stencil tutorial;
Clean up the stencil edges.
Once you have stenciled your wall, it's time to clean up. This next tutorial will teach you on how to create a diy stenciled wall. Decorate your diy decor projects with stencils for fabric painting, scrapbook stencils, glass etching stencils, and stencils for wood projects. This was my first time painting a diy wall mural! There will inevitably be a few smudges and paint marks that made its way under your stencil, so cleaning up the wall is part of the process. After you spray the adhesive on the back of the stencil, use painter's tape to secure the edges. How to stencil into corners, ceiling line, and floor line. Today i'll show you how to create beautiful wall art using a stencil made with your cricut. Wall stencils and a unique wall finish is all you need to decorate with color, pattern. As a kid, my mom painted murals on our bedroom walls, and she's part of the reason i knew i could do it and wanted to try it myself. Then use the stencil's repeat registration marks to line it. Creative ways to use your stencil. We professionally design our wall stencils in such a way that it's very easy to use, even for beginners.
We cover stenciling a feature wall in your home, how to use a stencil brush for great shading effects, creating a fresco, and more!. This next tutorial will teach you on how to create a diy stenciled wall. How to make your own adhesive wall stencils. The first thing you need to do is choose a stencil, and a wall to stencil it on. Because accent walls are all the rage (and with good reason), we're bringing you all the info you need to stencil a gorgeous one.
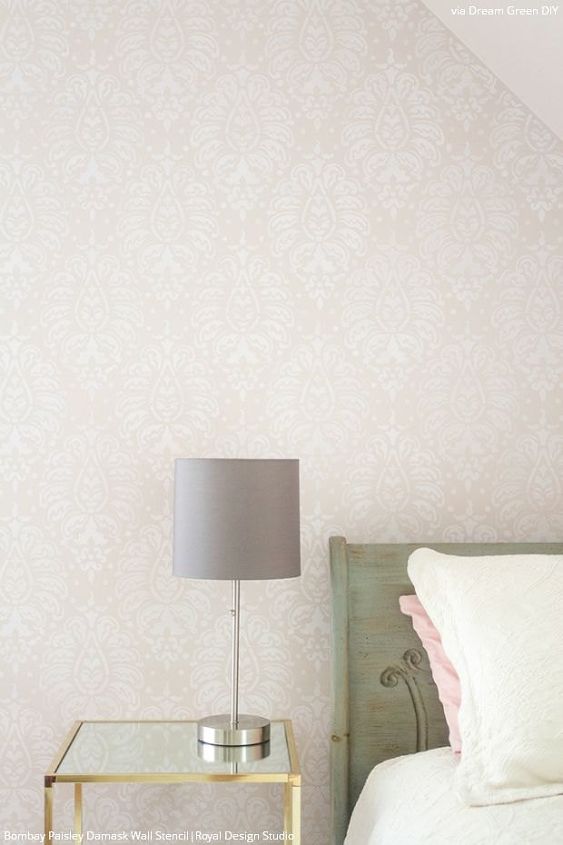
How To Stencil Tutorial Bombay Pink Paisley Wall Hometalk from cdn-fastly.hometalk.com Using your stencil level, attach your stencil to a corner of your wall using painters tape. Diy , painting , stencil , wall art next post: Take the extra time to clean, it's so worth it! Vertical stripes are one of the most versatile wall finishes. Creative ways to use your stencil. Diy projects & videos | crafts | wall stencil tutorial; Creating stencil art big enough to cover your whole wall is basically impossible, but using a smaller stencil and repeating it risks inconsistencies in the pattern if you place it unevenly. When i first told my husband that i wanted to stencil, not one, but two feature walls during the weekend makeover of our children's room , i think he thought i was crazy.
To stencil into the corners, ceiling line, or floor line you will need to bend the stencil and use a small stencil brush.follow this helpful video tutorial:
How to make your own adhesive wall stencils. When i first told my husband that i wanted to stencil, not one, but two feature walls during the weekend makeover of our children's room , i think he thought i was crazy. It does help with creating crisper lines on textured walls so you'll have less touch ups later, but often requires you to go a bit slower and allow the paint to dry more in between each stencil. Prep your wall by cleaning your surface, then apply base coat. Then, apply your stencil to the corner of the wall. The elements of design that every room needs are color, pattern, and texture. Once you have stenciled your wall, it's time to clean up. These arts and crafts stencils are fun to mix and match to create a truly custom look. Once your paint is dry, tape off all edges of your wall with the blue painter's tape. We professionally design our wall stencils in such a way that it's very easy to use, even for beginners. How to paint a diy wall mural for beginners. I do not personally use stencil adhesive, but you can do so if you choose here. Then use the stencil's repeat registration marks to line it.
Clean up the stencil edges. Wall quotes are very popular for home décor. Wall stencils and a unique wall finish is all you need to decorate with color, pattern. It's simple, fun and most importantly far cheaper than buying them online or at a store! How to paint a diy wall mural for beginners.
Diy Video Tutorial Using Wall Stencils To Beautify Your Home Recyclart from static.recyclart.org When i first told my husband that i wanted to stencil, not one, but two feature walls during the weekend makeover of our children's room , i think he thought i was crazy. If you want a little peaceful space on your home where you can drink tea or coffee. Today i'll show you how to create beautiful wall art using a stencil made with your cricut. The elements of design that every room needs are color, pattern, and texture. Make an accent wall in your house with a bold pattern covering the entire wall. We cover stenciling a feature wall in your home, how to use a stencil brush for great shading effects, creating a fresco, and more!. As a kid, my mom painted murals on our bedroom walls, and she's part of the reason i knew i could do it and wanted to try it myself. Prep your wall by cleaning your surface, then apply base coat.
Choose a stencil and a wall.
To stencil into the corners, ceiling line, or floor line you will need to bend the stencil and use a small stencil brush.follow this helpful video tutorial: The elements of design that every room needs are color, pattern, and texture. Creating stencil art big enough to cover your whole wall is basically impossible, but using a smaller stencil and repeating it risks inconsistencies in the pattern if you place it unevenly. Diy reusable stencils for walls or wood signs are easy to make with this simple tutorial using the cricut. We live in an apartment where (technically) we aren't allowed to paint. Our video tutorials will show you how to use our wall stencils step by step. Each stenciling video tutorial will go into detail about the type of paint and stencil supplies needed to perfectly execute your diy stenciling project. If your wall is dirty, it will show! Once your paint is dry, tape off all edges of your wall with the blue painter's tape. I do not personally use stencil adhesive, but you can do so if you choose here. Decorate your diy decor projects with stencils for fabric painting, scrapbook stencils, glass etching stencils, and stencils for wood projects. This tutorial is truly from the beginner standpoint. Then, apply your stencil to the corner of the wall.